May 7th, 1703
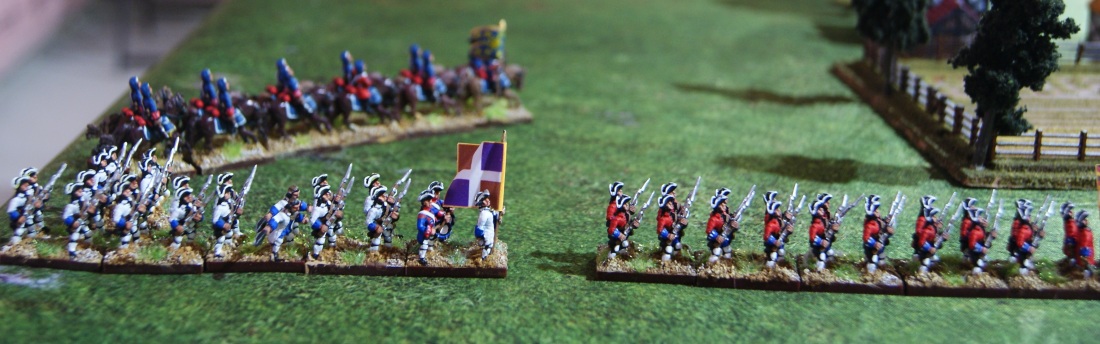
A little spring shower in the morning gives the French an excuse to dawdle more. The troops are finally arrayed by about lunchtime. On the right, Villeroi has the infantry shaken out into line formation. On the left Marsin is sending them in in column of attack. On the open left flank, d’Hautville leads the cavalry against the allied horse.
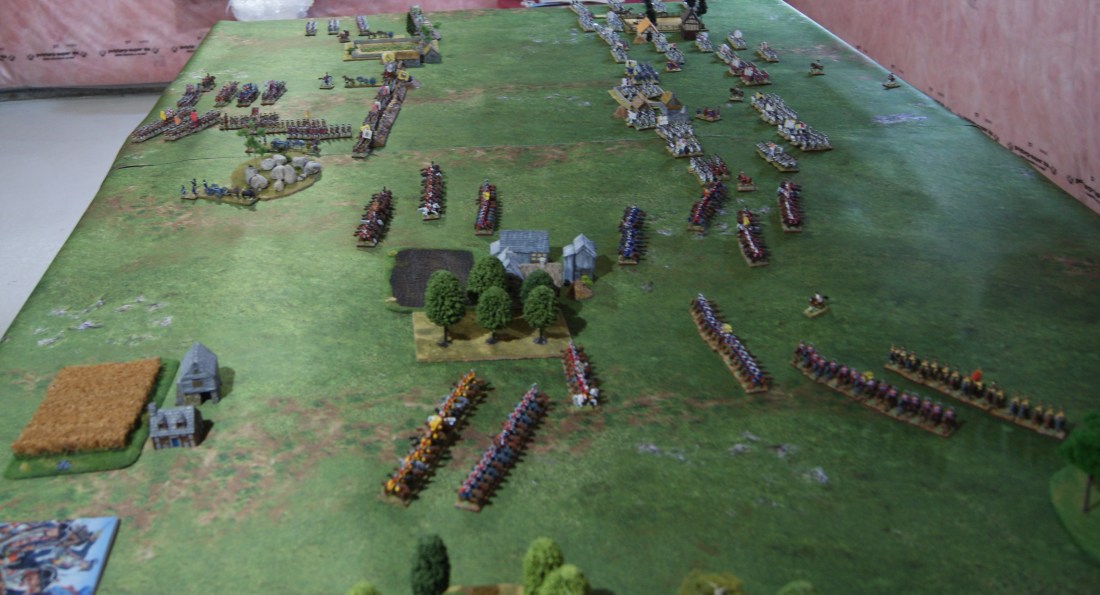
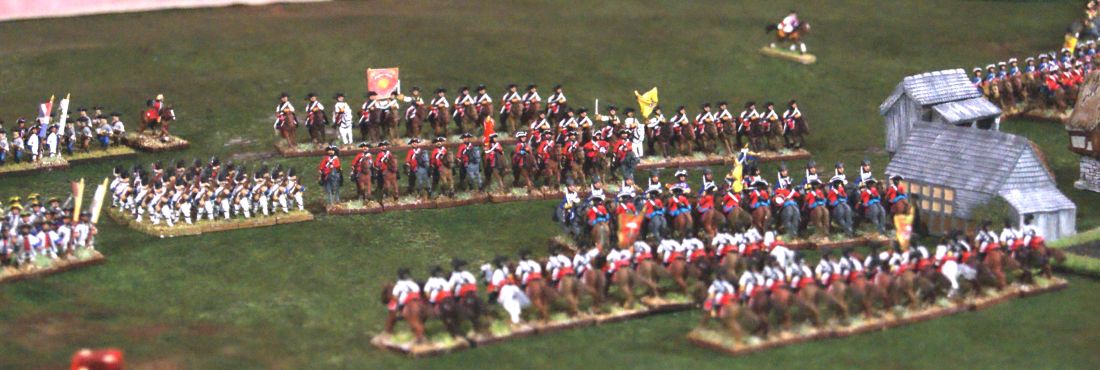
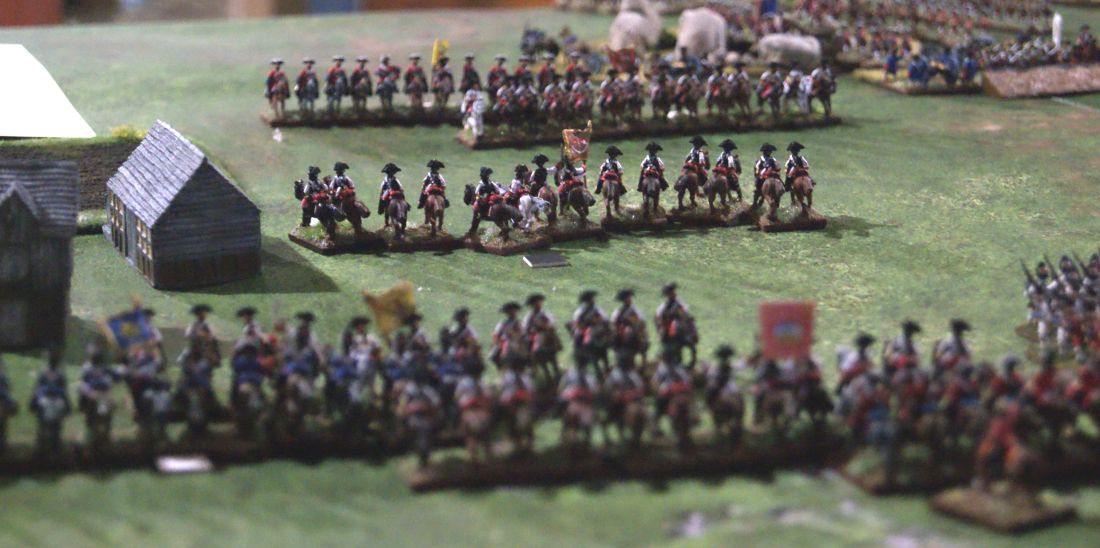
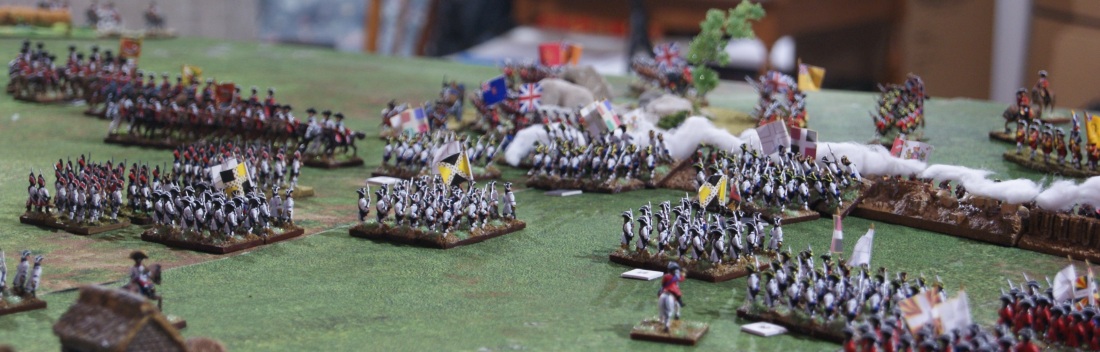
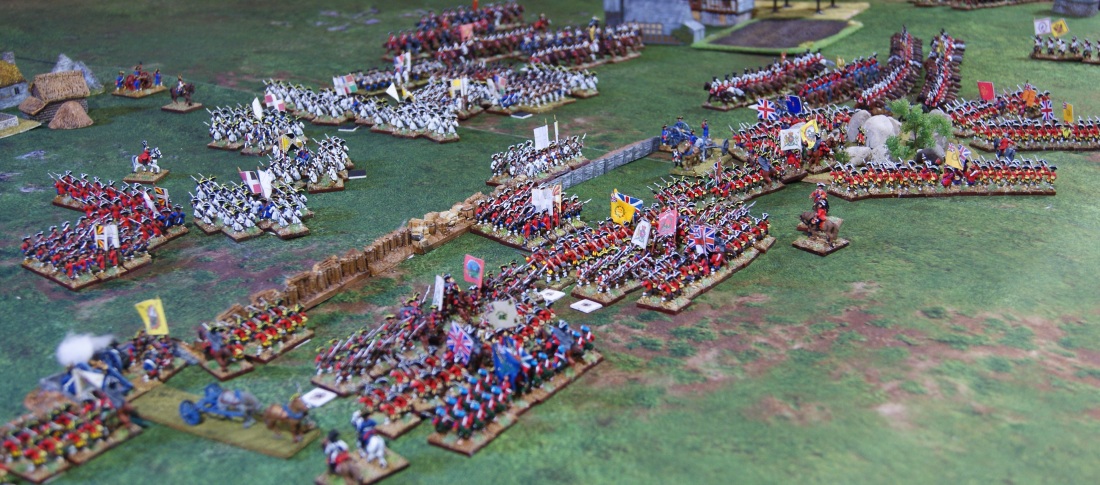
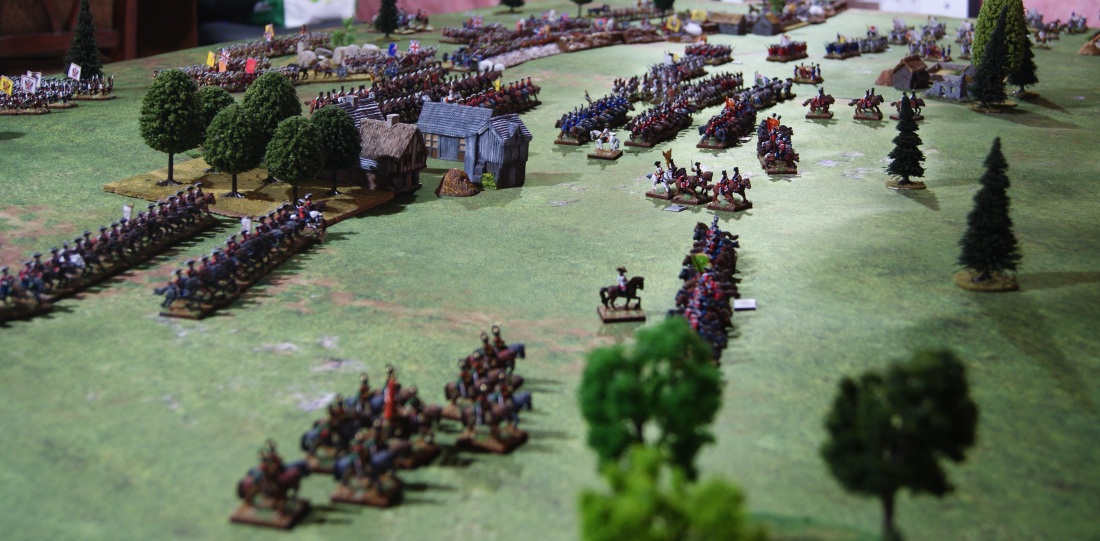
The whole board. Up front, British and Hanoverian cavalry on the left, French on the right. In the background, the fortified line held by the Hanoverian infantry and backed up by the British. On the upper right the French infantry advances to the attack. At the far edge of the table, the River Rupel is not shown.
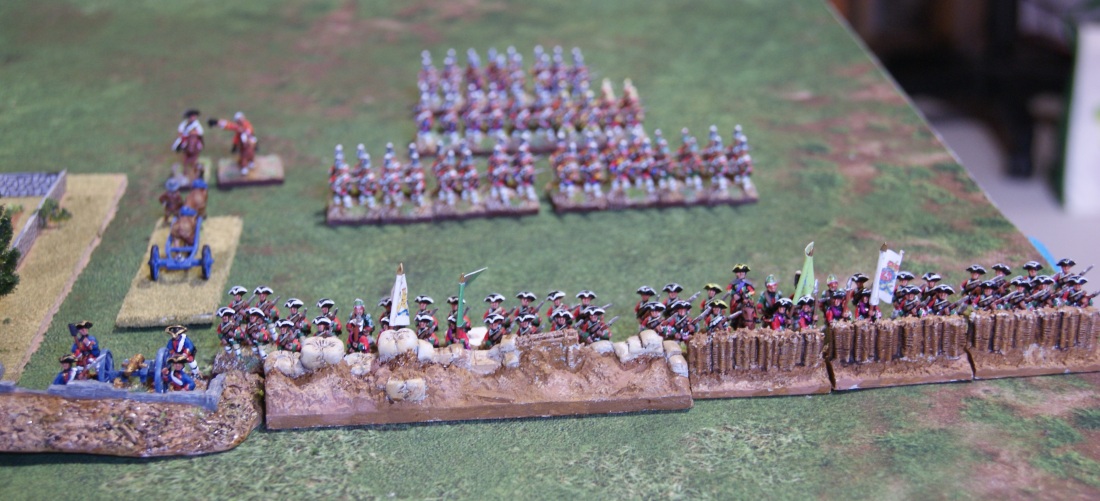
The French right flank advances upon the Allied earthworks.
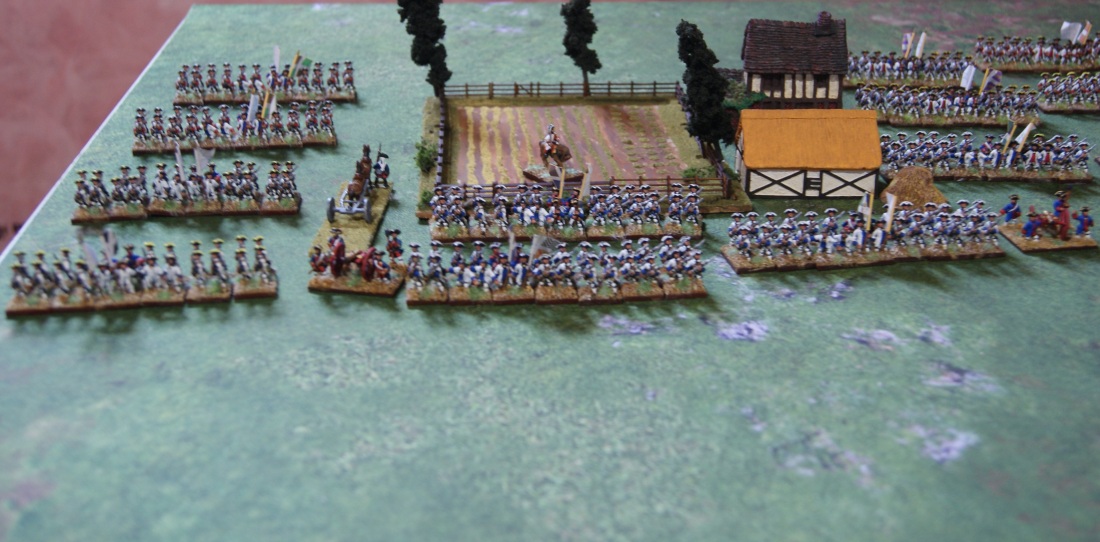
The Hanoverian infantry and artillery are dug in using anything they could find. Behind them the British and Hanoverian grenadiers wait as a reserve.
12:45
A little bit of artillery interplay as the French advance. On the open flank, both groups of cavalry move forward eagerly, seeking contact.
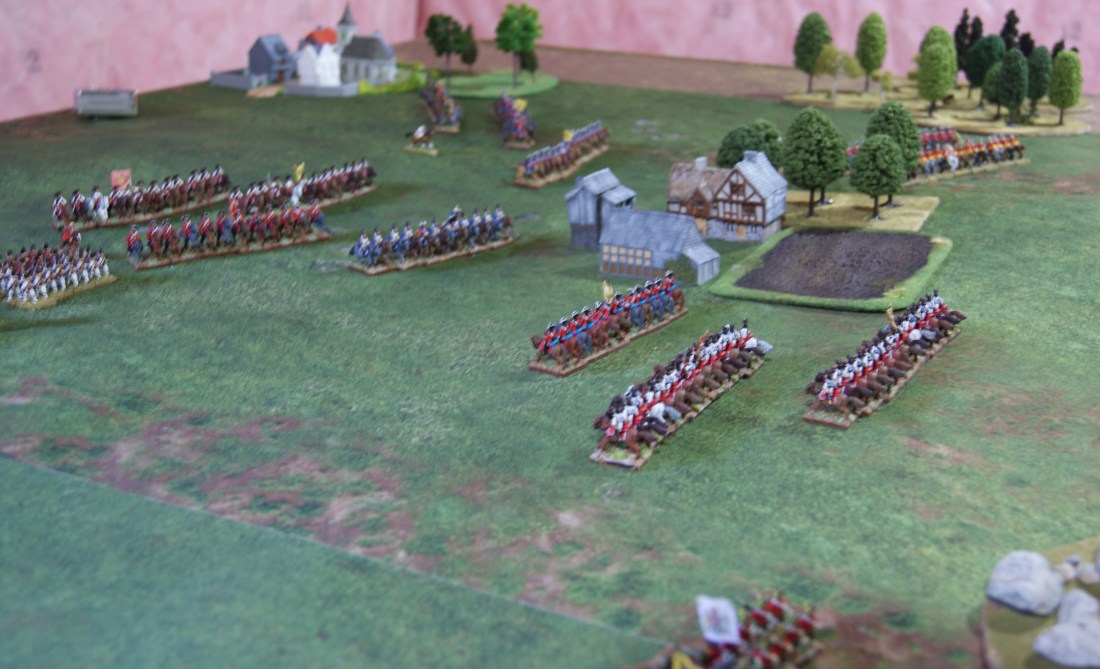
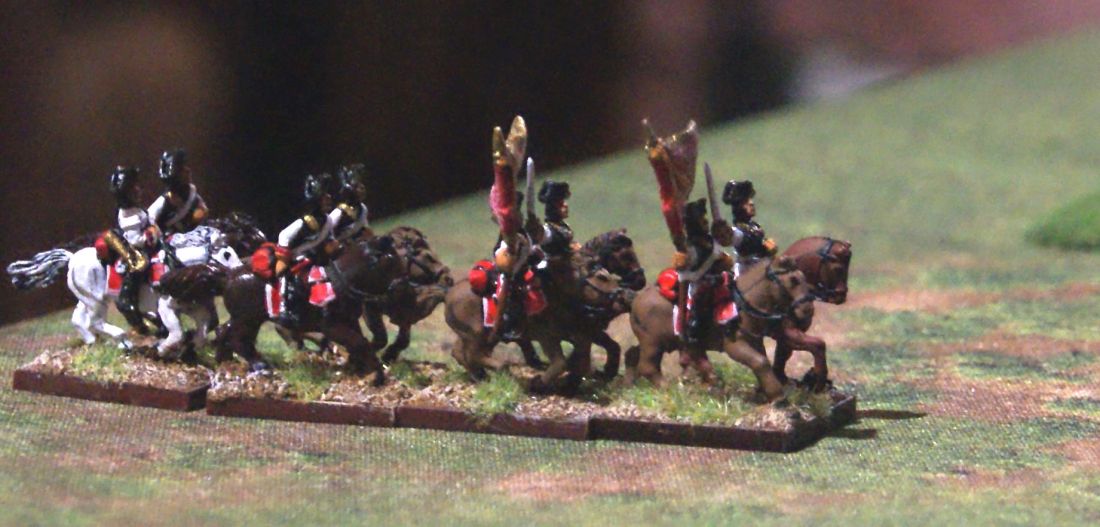
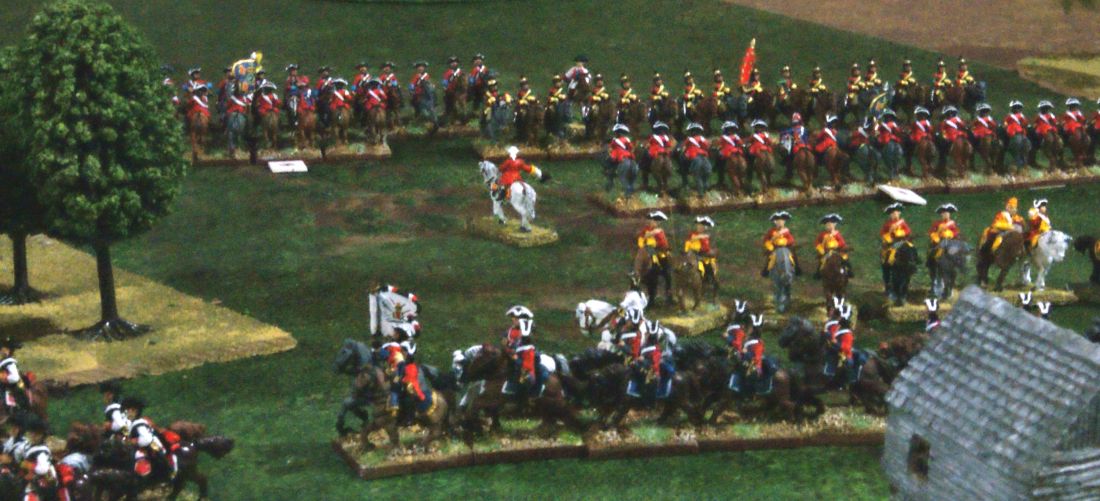
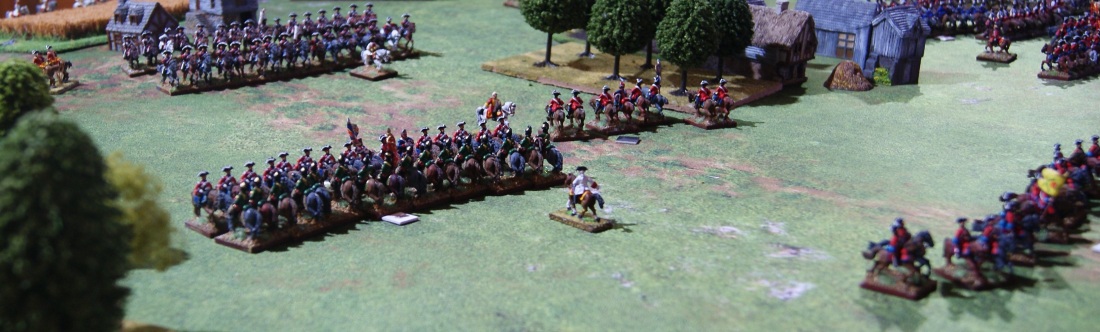
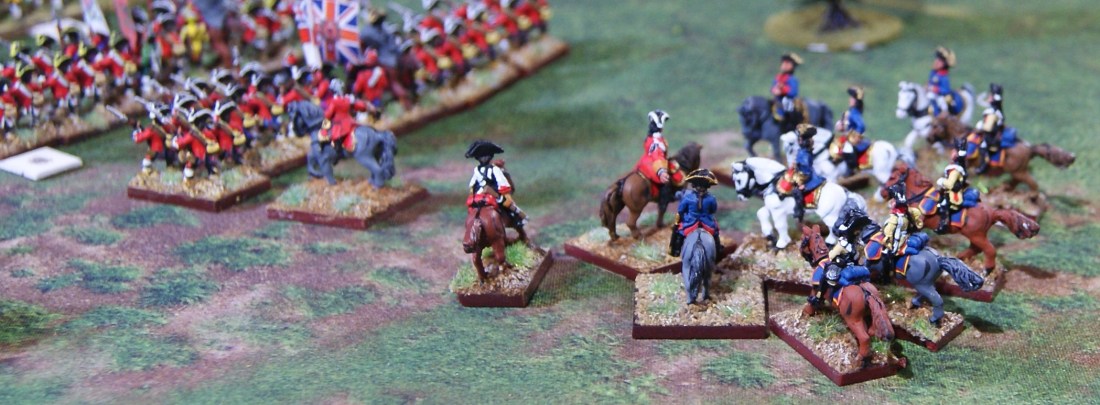
Looking to the Allied right flank from over the Hanoverian infantry, we see the Alliance heavy cavalry going into action. The British 3rd Regiment of Horse is followed by Grothaus and Hodenberg Kurassiers of Hanover. In the background, the town of Alost.
The British dragoons move forward to take on their French counterparts.
13:00
The cavalry on the open flank engage. It seems an even affair as the contacting units on both sides recoil, moving to the rear to reorganize.
The heavy cavalry engages.
13:15
The cavalry battles continue, with no one getting an advantage on either side.
The dragoons from each side on the outer flank continue to hack away at each other.
La Reine Cuirassiers, drawn in from outpost duty, arrive on the battlefield.
With the heavy cavalry engaged in swirling battles around them, the French grenadiers, supposedly leading the way in the assault against the Hanoverian right flank, are bogged down by the threats to them. Here they have formed square in self-defense.
13:30
The French infantry closes up with the enemy fortifications as the cavalry battles continue to determine who will control the open flank.
The British 10th Dragoons battle the Royal Dragoons (center) while their compatriots fall back to reform (left) and the French supports come on (right).
The Palffy Kurassier, lead unit of the Austrian reinforcements, begins to arrive.
13:45
Attention is focused on the cavalry as they come to a conclusion of sorts. The French Royal Dragoons break and run, leaving the balance between the respective sides pretty much equal.
However, closer to the center, the Hodenberg Kurassier are driven from the field, leaving just two Alliance units to face five French, as the La Reine are coming up quickly.
Hodenberg Kurassier (center) turn their backs on their enemy (foreground,) who are taking a breather while they get themselves sorted out. In the background, British 3rd Regiment of Horse and Grothaus Kurassier prepare to meet more than twice their number.
14:00
The French infantry move up into musketry range and get a blast or two for their problems. One battalion taking cannister immediately evaporates toward the rear.
The Hanoverian infantry, well dug in, fire a volley at the approaching French.
14:15
Attention shifts quickly to the infantry. On the French right flank two more battalions decide to call it quits after particularly effective Hanoverian musketry. The Hanoverians here have taken almost no damage.
14:30
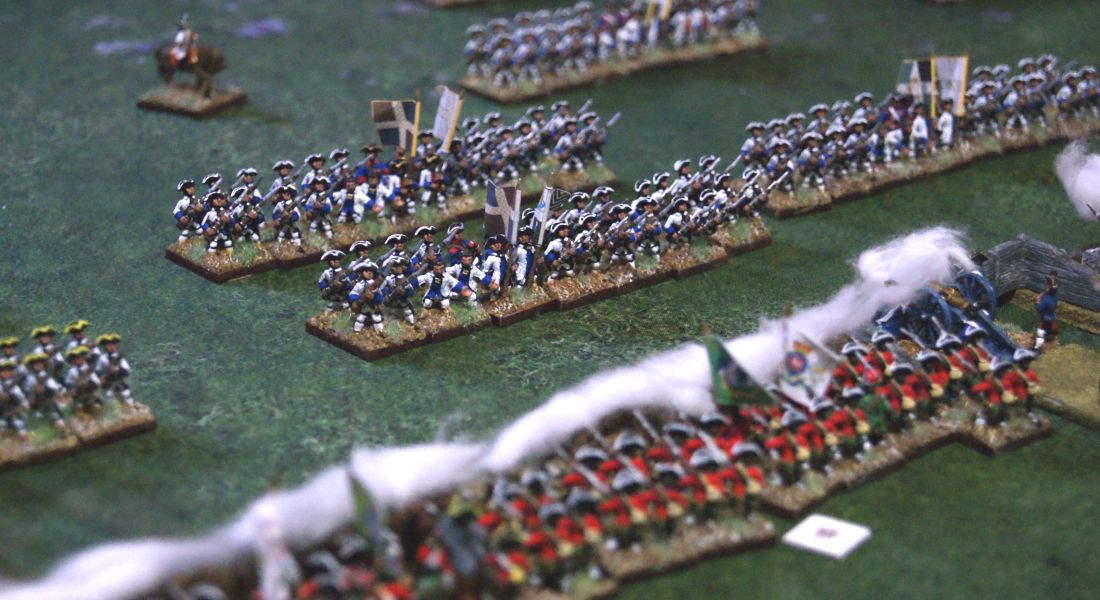
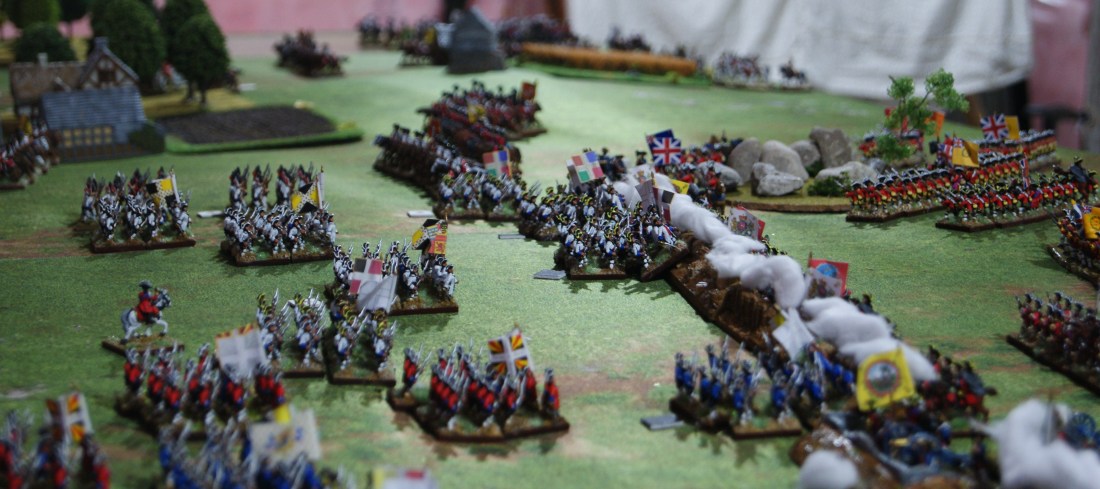
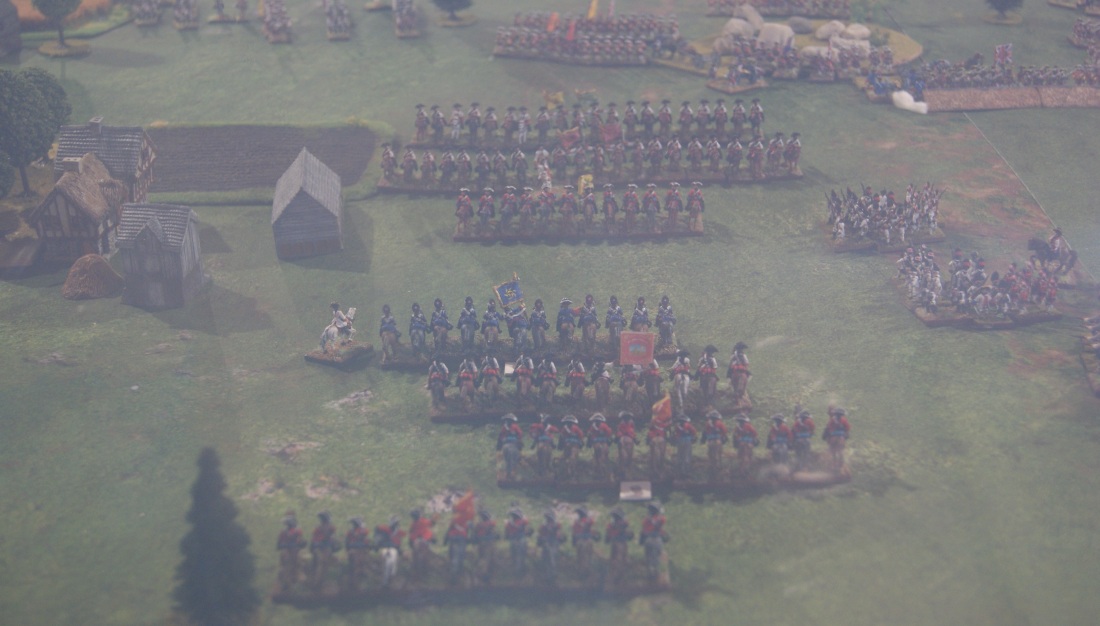
Closer to the center, Marsin has elected to have his battalions attack in column of assault. These press forward more successfully. Three battalions make it to the fortifications and push-of-pike.
II battalion Gardes Lorraines (blue coats) has made it to the entrenchments and is engaging the Hanoverians. Three Swiss battalions (red coats) follow up behind while I/Gardes Lorraines hesitate after taking a blast of cannister.
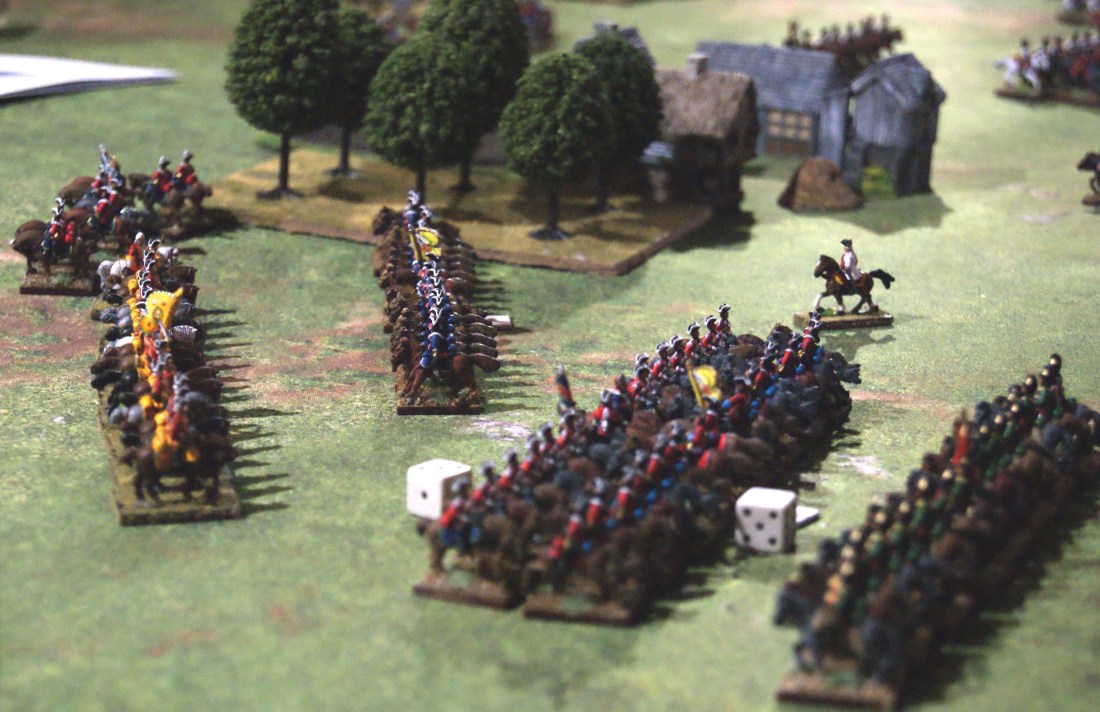
In the center rear, a battalion each of La Sarre and Royal Roussillion are climbing the fortifications to get to their enemy, while more supporting battalions move up to try their hand. In the upper left can be glimpsed the Hanoverian and British heavies.
A better over-all view showing the three battalions assaulting the entrenchments, and their supports moving up. The Alliance heavies are in the background and in the hazy distance can be seen the first of the Austrian units.
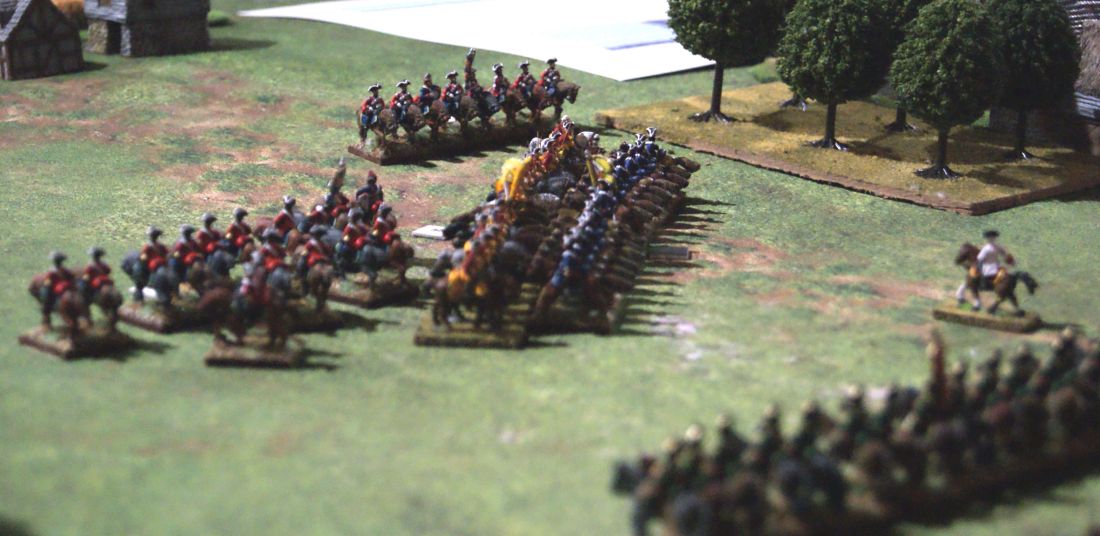
Over in cavalry country the heavies are still eyeballing each other warily, but the dragoons have begun to mix it up again.
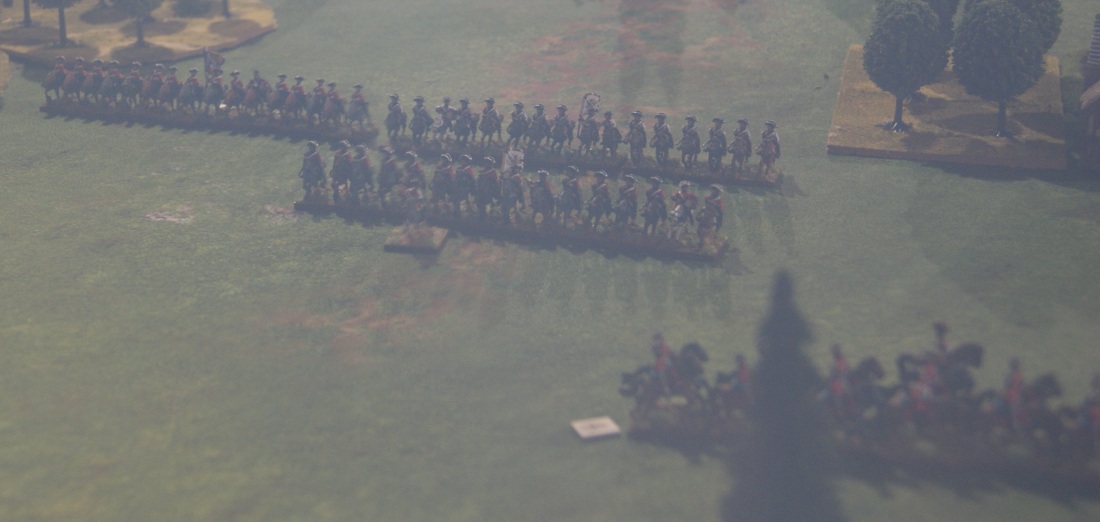
On the extreme flank, the dragoons are at it again. In the upper left the small King’s Own Dragoons have lit into the Apchon Dragoons like a frenetic rat going after a terrier. Upper right the French Schomburg Dragoons and the Royal Irish Dragoons are committed in their charge. In the middle distance the red-and-yellow streak are the 10th Dragoons (My first unit, sigh) leaving the battlefield post-haste. In the foreground the Austrian dragoons, apparently just passing by, will soon be stopped to join in the fray.
14:45
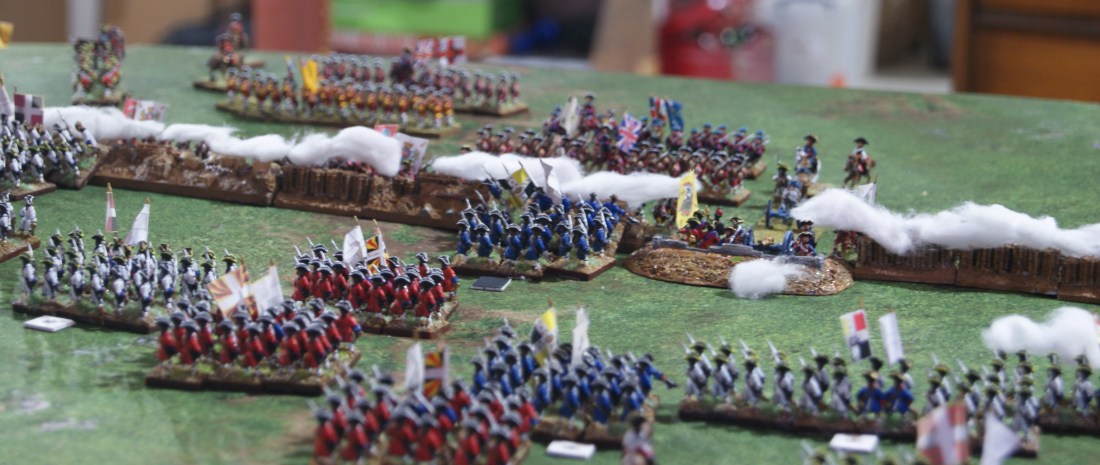
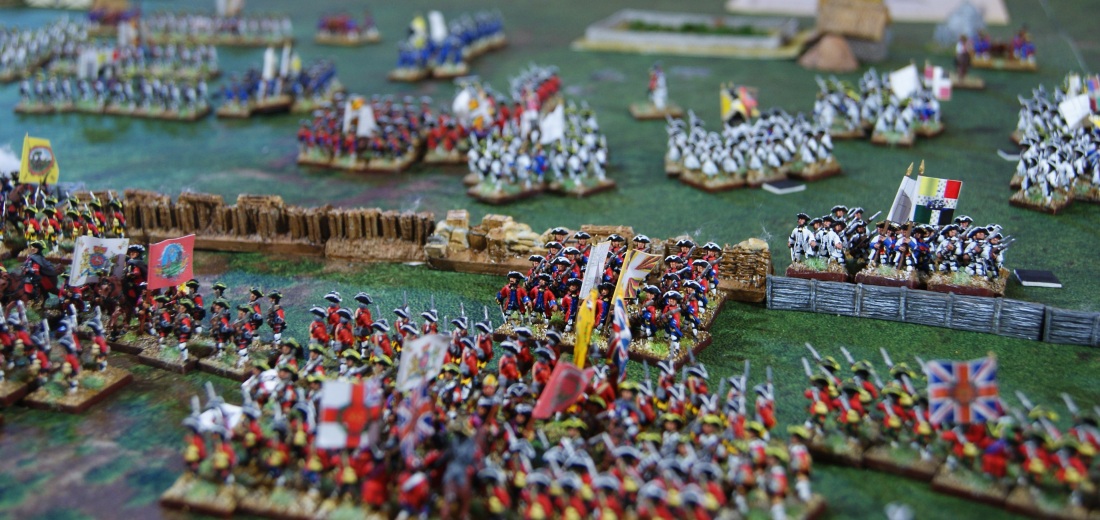
The three assaulting battalions are repulsed, but at the same time they have sent the defending battalions running. There is a great empty gap in the entrenchments! Two more French battalions move in to fill that vacuum.
In the center of the picture the II/Courten is over the wall, while to the right of them II/Royal Barrois is following their example. The British and Hanoverians are milling around in the foreground, trying to shake themselves out in time to repel the cheeky Swiss.
A good over-all view showing the two battalions breeching the empty entrenchments, and the lack of supports behind them. Many of the French troops toward the upper left are fleeing the field, while the supports are being hindered by the frightened hordes streaming to the rear.
On the far flank, the dragoons are fighting it out. On the very right Apchon Dragoons have recoiled. To the left the Schomburg Dragoons and the 5th Royal Irish have come together with a crash. Beside them, the disordered King’s Own Dragoons have decided to call it a day, and in the rear, two Austrian dragoon regiments are shaking out into formation preparatory to advancing.
French reinforcements arrive, drawn in from outpost positions on the Scheldt crossings; 2 battalions and one regiment of heavies.
Austrian reinforcements arrive; the infantry besiegers of Termonde are beginning to arrive once their cavalry is out of their way.
15:00
On the far flank the Schomburg Dragoons have been scattered to the winds. Now there is only the shaken Apchon Dragoons to try and stop 1 British and 2 Austrian dragoon regiments. They begin to fall back, postponing the moment of decision. A message has been passed to the heavy cavalry closer to the center and they have begun falling back as well.
Coincidentally, at the French left flank infantry, the Duc de Berwick has ordered a halt to the attack. He begins moving infantry battalions around to fill the gaping hole in his center.
The last two French battalions crossing into the entrenchments have been repulsed by musket fire from the well-placed British reserve units.
Ominously dark clouds are moving in overhead and lightning sparks on the horizon.
In the foreground the Schomburg Dragoons flee. Close by the Apchon Dragoons turn to face their pursuers, the Austrian and British dragoons (left.) In the distance you can see the French heavy cavalry and vague glimpses of the rest of the battle.
15:30
Marlborough intends to order a general advance, but there is a major distraction. Not just the Austrians have arrived. The complete Prussian staff has shown up as well, bringing good news. The Prussians are right behind the Austrians! It is possible that the French will be enveloped and destroyed today!
As they confer on a rise behind the British/Hanoverian lines, droplets of rain begin to fall. It quickly turns into a deluge, with lightning flashing nearby. “This way, Gentlemen,” calls Marlborough, “There is a farmhouse within our lines in which we may take shelter.”
Just in rear of the British reserves, Marlborough confers with the Prussian staff, including their Commander in Chief.
In the rain, as the French forces begin to withdraw, Generals meet. Marsin declares hotly, “Why did you not continue the attack?” Villeroi replies, “Because we were getting nowhere! I was losing men in great numbers and we made not a dint in their nice defences!” “And yet my troops did,” declares Marsin. “We broke right through his defences! Had Marbrouke not been able to pull his reserves over from your side, we could have had him!” “You never would have,” says Villeroi. “The position was too strong.” “The King shall hear of this! You shall be disgraced!” “Well, let him hear all he wants. Right now I am wet, and I do not wish to be. Let us get ourselves out of this accursed trap before it cracks shut on us.” “This is not the end of this, Villeroi.” 15:45
Muskets can’t be primed. Even cannon cannot be fired. The infantry battle comes to a fizzling halt.
On the outer flank the horsemen are aware of the slippery conditions and reduced visibility and proceed cautiously.
The French heavy cavalry are cautiously retiring, while the Alliance heavies seem rather reluctant to pursue all out. On the right, the French grenadiers have formed squares to protect the French infantry’s left flank.
On the outer extreme the Austrian and British dragoons advance, looking for their unseen adversaries (top). The French commander, taking advantage of the situation, forms up the Apchon Dragoons (bottom right) and marches them off smartly to join up with the heavies.
16:00
Thus does the battle end, not with a bang but a whimper, reduced vision, wet powder and confusion.
The French sullenly withdraw under the lashing of the heavy downpour. The Allied pursuit is non-existent, as Marlborough seems more concerned about entertaining his Prussian visitors.
I’d like to say a few words in introduction. My name is Gerald (Gerry) Upton, retired and living in Kitchener, Ontario, Canada.
I’ve been interested in military history ever since I can remember, and in wargaming since about 2 days after that point. Summers from about 5 years old on I went to our family cottage where a local friend and I were interested in ACW miniatures wargaming. This was mostly because the only inexpensive figurines were the Airfix ACW sets. They got combined with the Wagon Train, and the French Foreign Legion as Zouaves! Talk about sand tables! We played on the beach!
Somewhere in my early teens I discovered these “new” adult wargames from an obscure company called Avalon Hill. My first one was Blitzkrieg, which was just out. I found Midway in a department store and saved my pennies until I could get it. That one I still have; a bunged-out old box with the game and the Coral Sea and Leyte Gulf variants along with the Wargamer’s Guide.
One friend had Bismarck (’62.) Another had Battle of the Bulge. We used to get together – mostly at my place, it seemed – and play them. I bought Victory in the Pacific; that was my last one.
I bought a year’s subscription to the Avalon Hill General, starting with Vol. 1 #2. I found it was all about HOW TO WIN, WIN, WIN! And eventually threw them out. (Pity!) I bought some S&Ts when they started putting out games in them. First one was Chicago, Chicago and the Flight of the Goeben. I started into miniatures gaming, collecting and painting 25mm Napoleonics, but I didn't really have the space to play them. Then I discovered Jack Scruby's 9mm Napoleonics and started collecting and painting them.
Then into my 30s and 40s and things like work and family intruded and gaming friends went their own ways. I painted more 9mm Napoleonics, dreaming that some day I would get to use them. I eventually moved to the other side of the world and my games collection disappeared. Except for Midway and VitP, which I found in my parents’ basement. Plus all the 7,200 9mm Napoleonics.
As retirement approached I got re-interested in the Avalon Hill games, and decided I would like to design some of my own board wargames. As a preliminary I felt I had to figure out how to make quality counters and game boards. I made some replacements for AH game counters and decided to see if people would buy them. Well, that took off, and now I’m louiefourteen, a mainstay on eBay, designing and selling replacement counters for old board wargames.
I found that on the internet you can find all those games still around – used, of course. I started collecting all the ones I remembered from my youth. Then I started getting some of the ones I always wanted but didn’t have the chance to get. That list kept expanding. Now I have quite a good collection. Just not entirely sure what to do with them.
I wanted to get back into miniatures as well. I found I was more interested in the Seven Years War era; pity when you have all those Napoleonics, but, hey, tastes change. I started buying and painting Essex Seven Years War figures, but soon found that it was causing me problems with my spine. I still paint a little bit now and then, but mostly I have been purchasing my figures from a painting service. Luckily they use Essex Miniatures as well.
So now I have lots of SYW miniatures, and I've been reading about Marlborough and the War of the Spanish Succession. Having studied several different viewpoints of this age, I've always wondered what a wargamer might do if he has these opportunities. So now I am trying to go back 300 years, and take my little pewter figures back 50 or so. Anachronistic!
View all posts by anachronisticwarmonger